16.4.23

2023 Gulfport Midwinters

 In the spirit of procrastination (as usual), I decided to make boat improvements after the 2022 Nationals in Elizabeth City a week before the 2023 Midwinters in Gulfport.  Thankfully that only meant a mulligan on the traveler controls.  Still hard to control.  In this edition, I am moving to a 2:1 system with control adjustment on both the port and starboard side of the boat.  After I finished putting it on I learned that block gets stuck on the tiller moving from side to side, so I added a roller that the traveler loop has to rotate around. It seems to work, although not exactly elegant.  There's an opportunity for further refinement

Anyway, on to the regatta.  Light air and choppy with breeze building in the afternoon...and another chance to face off against the mighty Mouse Trap.  This is the Jeff L. boat that has won everything for like the last decade.  His boat has been the hot Mistral mod Moth and also a boat that I had a lot of success sailing when I got the opportunity to substitute for him.  After day one we were all tied up. I had another mast puller debacle that lead to a rough end to the first day with 3 race where I had no leach tension.  Leach tension is important upwind! Especially when the breeze picks up.  I kept shoving water bottles in the mast step as a mast block, but only had minimal success.  This is two midwinters where this was a problem.  I will finally move to a forestay like the rest of the fleet.  Should have done this after the first regatta.  

Day two was similar to the first day.  light air in the morning with lots of chop.  We got in another 4 races that went my way in the head to head battle.  The boat is fast upwind and downwind in light to moderate conditions.  The reaches were a push between the designs. It was great to get a win in Gulfport.  

There was some learning and will be some improvements before the next event.  

  • Change the mast puller out for a forestay
  • Add a composite gooseneck stronger and lighter than the metal one
  • Stiffen the tiller - the squeaking and friction from the spacer rubbing was driving me crazy
  • Stiffen the boom - the boom bends way too much.  

Next up, the Mug Race: a distance race from Palatka, FL to Jacksonville.  I should be the shortest boat in the race.  First time doing a Portsmouth handicap race in a dinghy!  More to come...

Regatta pictures:

2:1 traveler system with controls on both sides of the boat.
The roller is just to the left of the access port


Mousetrap (102) and KBN (134) off the starting line

Upwind to the finish line

Close up across the finish line

Downwind leg

Reaching in the bay chop

Fleet spreading out after the start


2022 National Championship


After a troubled first outing, the might Knotty by Nature, #134, was back at the Blackberry Boatworks garage to rectify some of the issues that emerged out of the Midwinters in Gulfport.  Quick recap of those issues:
  • NO feet traction at all
  • Broken gooseneck
  • Mast puller broke
  • Traveler was ridiculously hard to control
  • Boat took on massive amounts of water with no easy way of removing it
  • Bottom finish was not exactly smooth
  • Boat was awkward and hard to move on the dolly
The gooseneck issues was resolved sufficiently after day one of the midwinters so I left that alone.  The mast puller issues was resolved with a spliced loop around the boom.  That seemed resolved after the fix.  For the traveler, I opted to change from independent port and starboard controls to a single control in the center of the boat.  I thought the first version was clever with spliced in shock cord on a 1:1 system, but it was not...at all.  It just needs to be easy to get the traveler centered. That seemed like a good plan (emphasis on "seemed").  Next up, the bottom of the boat needed attention.  The primer was hard as hell so I decide to add material rather than remove.  The boat took on some primer to fair out the finish and then some royal blue gloss paint out of a rattle can (easy and cheap to repair if it gets dinged)
New paint prior to buffing out

To resolve the water issue, I put a Super Suck autobailer in the cockpit.  This was equipment was recommended by Joe B. These things really work and it was totally worth the extra pound.  Rather than just extending a drain flap, this bailer uses venturi effect to more efficiently pull water out of the cockpit.  Here's a picture of the product:

Sea Sure Super Suck Bailer

I found some EVA adhesive backed foam in a wood colored diamond pattern.  To finish it out a little nicer, I found some gray wood grain EVA trim.  I think it turned out pretty nice and the traction difference is a game changer for someone that prefers to sail barefooted.  To finish out the cockpit, my neighbor made me some super cool boat name and sail number decals for the transom and tanks.  The last project I tackled was modifications to the dolly.  Moving the boat was awkward and difficult with the narrow short boat on a laser dolly.  I shortened up the wheelbase and length, and added a custom hull guide for the deep V in the hull.  Game changer.  The boat is super easy to load and move on and off the dolly...as it should be.   
  
Bailer and added EVA foam pads installed

Cockpit with completed EVA foam pad

There was probably more that could be done, but for now this is good enough to head north to the Moth National Championship for a second regatta attempt in #134.  The trip was an easy 10 hours with two Buc-ee's stops for a breakfast burritos and BBQ.  I made it to South of the Boarder (NC/SC border crossing) at noon.  Had to stop for a sticker for the transom.  Seems like a rite of passage for my boats.  I made it up to Elizabeth City in the early afternoon and had time to both rig up and catch up with the rest of the fleet before the sun went down.  
Regatta rig heading north
  
Boat rigged up 

Bullet proof gooseneck after composite failure in Gulfport.
PVC coupling, a laser cres steel gooseneck, and some band clamps

Bow of the boat showing puller and control lines

Aft side of the mast - boom vang, outhaul, and cunningham control lines

Fixed loose footed sail on boom

Vang attachment on the boom

Boat rigged up and ready to race along with the rest of the fleet
Showing off the transom with the new decal

Rigged up and ready for race one on Saturday

After some postponement ashore we finally made it out on the water.  I was still a little nervous that the boat was modified to an extreme that was maybe not competitive with the mistrals. I got a little practice in before the start. Wow.  So much easier to sail than the last time in Gulfport. I got a decent start towards the pin end of the starting line with two boats to leeward. The breeze was still patchy across the racecourse. I took an early hitch out to the right and found a good patch of breeze that got me in front of the group that went right. I made it around the first mark with a narrow lead and we took off downwind. The boat seemed a bit more stable than the mistral once I figured out where to sit. The first leg of the the triangles were quite deep with the second leg a close reach. Pretty fun, and with the patchy conditions, a good opportunity for the fleet to make gains. After another windward and leeward leg I consolidated a first place finish in the first race. 
After a couple more races in similar conditions The boat seemed to have a slight speed and height advantage in the lighter breeze. It was a great first day with first place finishes and a second place. Day two started with another postponement, but turned into a great afternoon breeze that tapered off to nothing in the last race. It was another good showing for 134 even after an over early on one of the starts. At the end of the regatta I finished in first in the Gen 2 class.  Cool moment. 

The only pictures I could find from on the water were posted in the local newspaper along with a short article.  Here's the link:  Daily Advance

Trophy for the weekend
(the cup, not the bug spray😆)

28.10.22

First splash and the Moth Midwinters

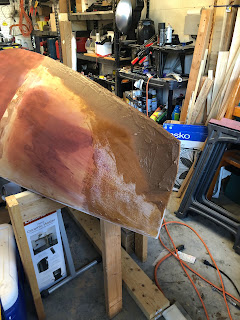
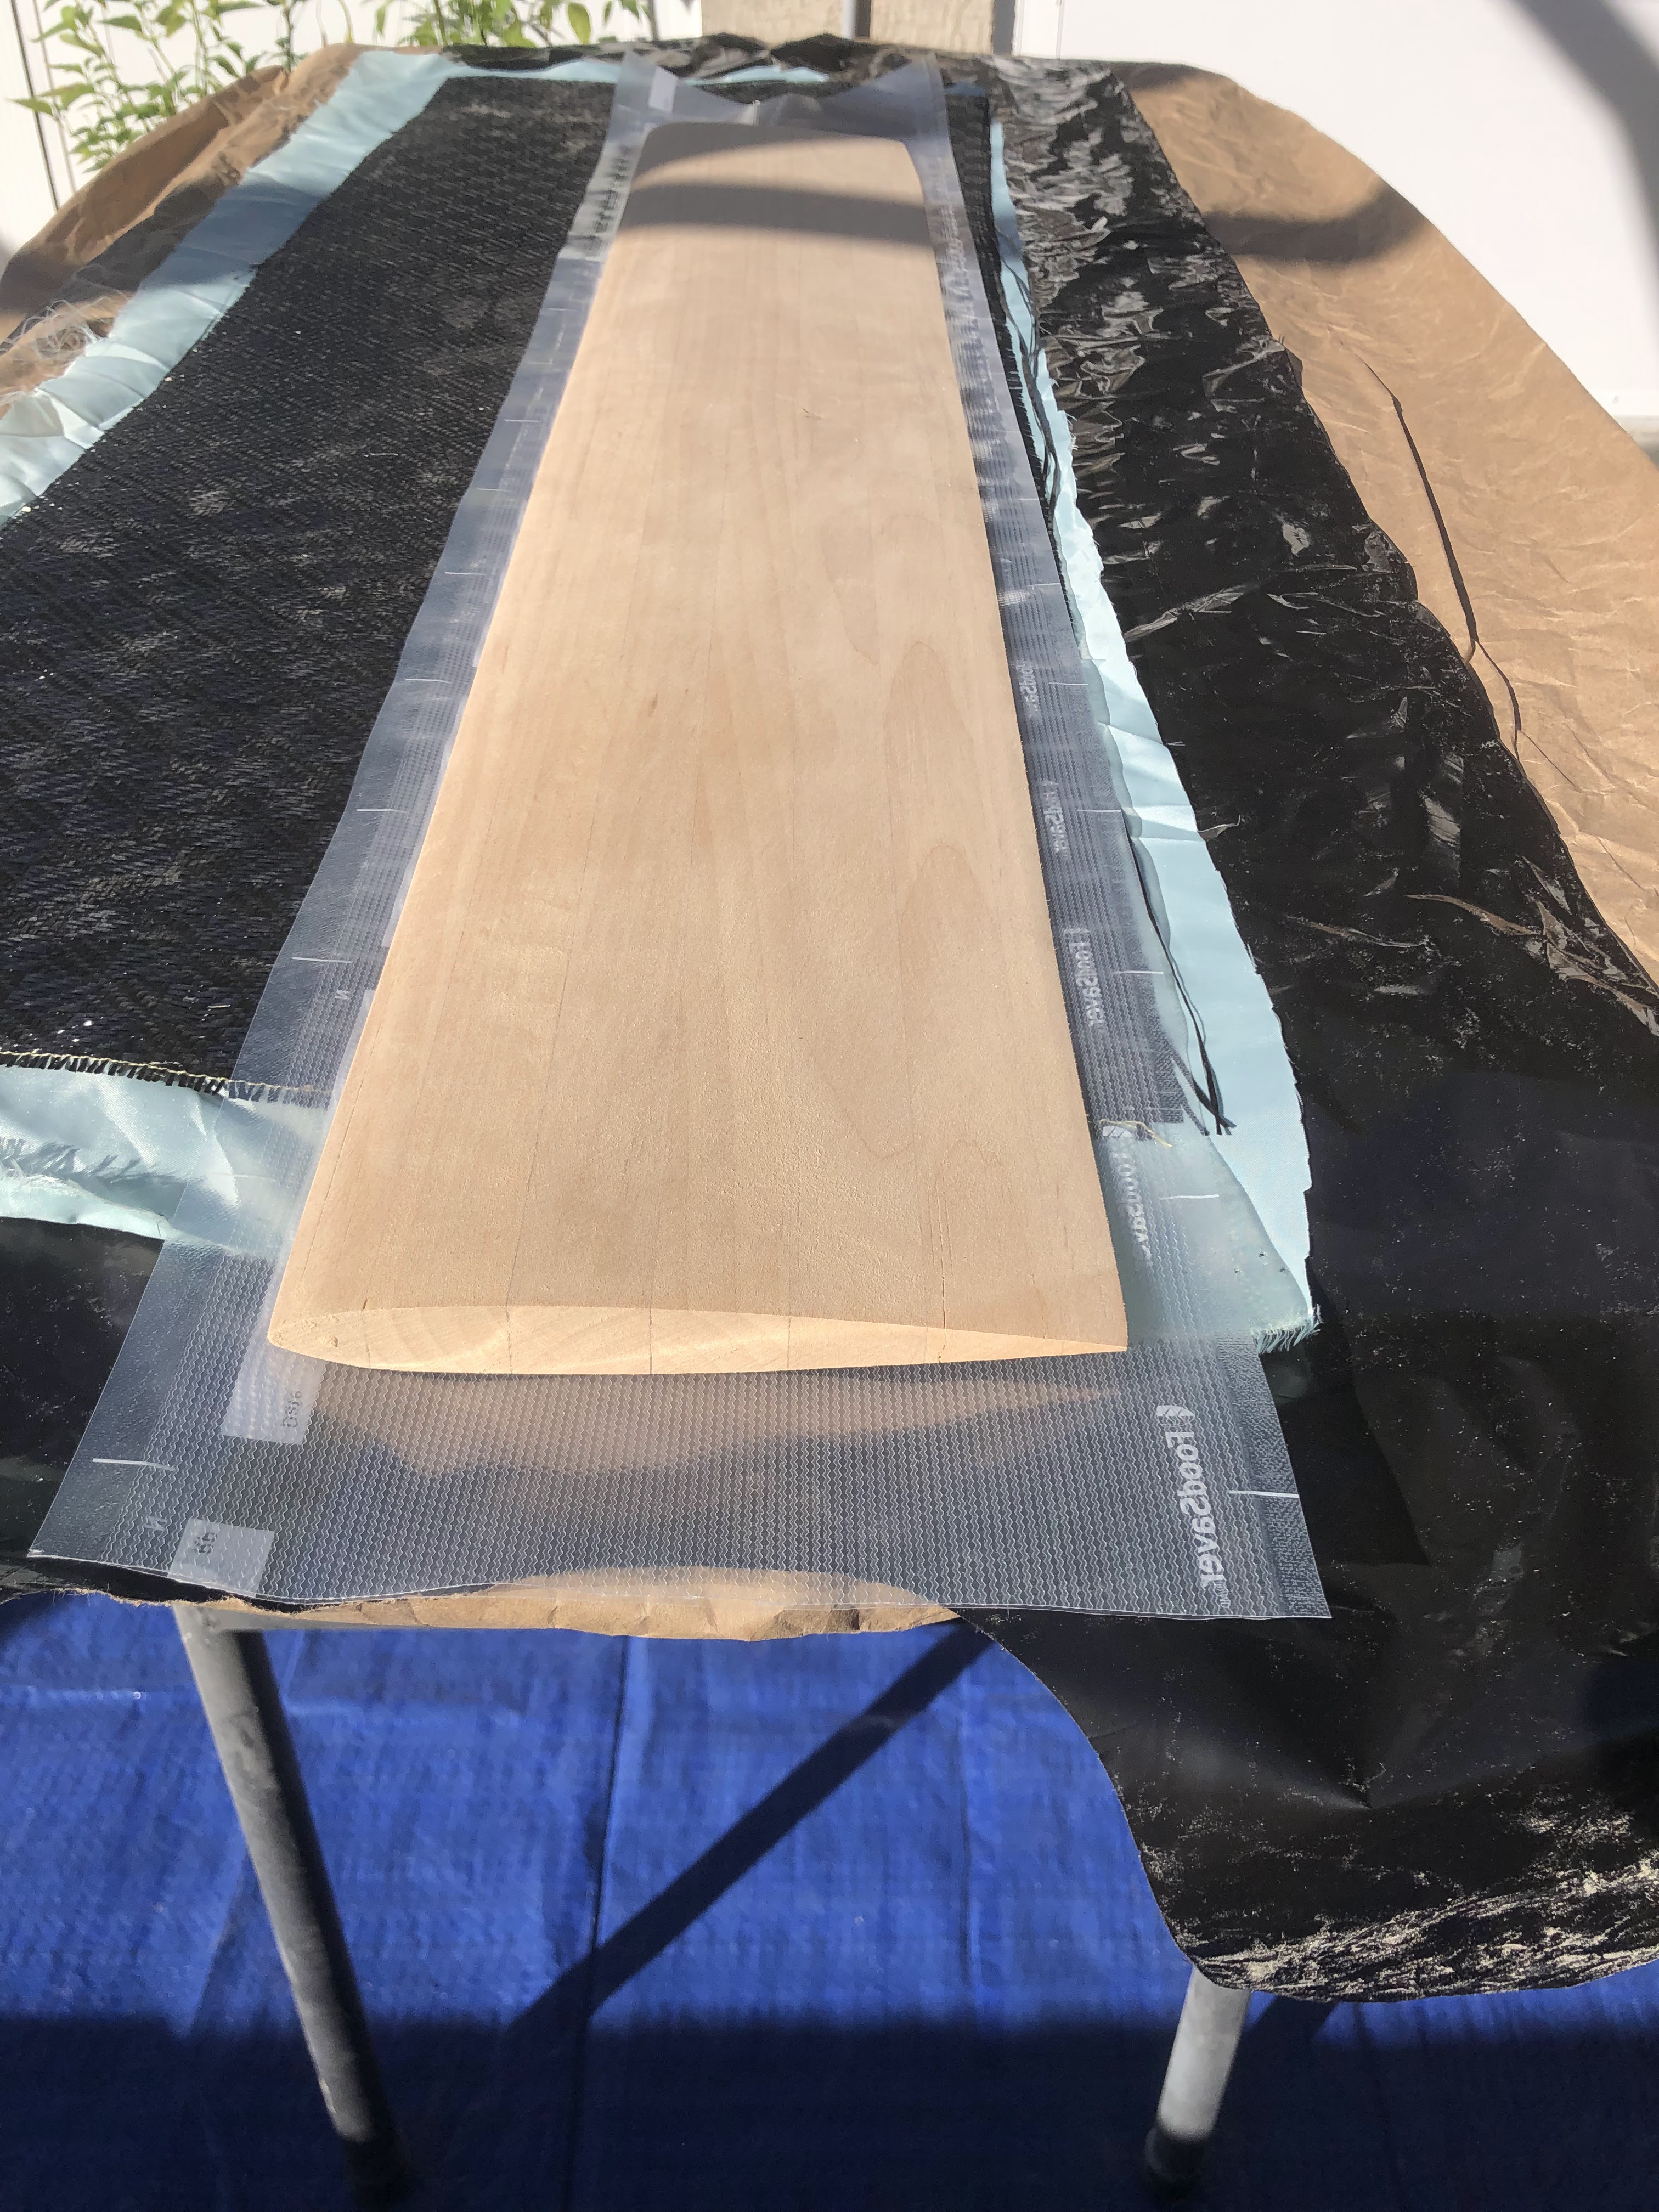
 Between sanding and rigging the boat for the first time, there was lots to do before heading to the race course on day one of the Classic Moth Midwinters.  I didn't take many pictures, but I here's the one I did take with the port hole cover getting installed along with a wood pillar to mount the mainsheet block to.

I had a plan for things like the vang, the cunningham, the mast puller, and the traveler controls, but none of these things were proven.  The mechanics of sailing was of little consequence if the design deviation from the mistral and the Mousetrap (mod Mistral) was not successful though.  Quick recap on some of those differences:

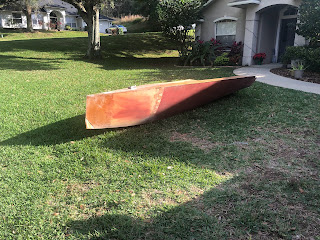
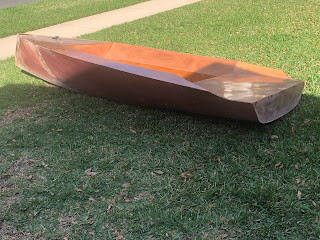
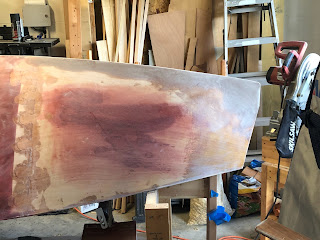
  • Significant reduction of wetted surface forward.  The bow is much more narrow and the beam is intentionally shy of max.  
  • Intentionally reversed bow.  I added the reversed bow to reduced volume forward.
  • Shape at each station was pushed down towards the waterline so that max camber was closer to the centerline of the vessel.  The result was flatter gunwales and slightly more volume below the waterline forward compared to the Mistral
  • Flattened transom with a fair transition into the corners.  
A rite of passage for a new boat is the all-important class measurement.  The length was on the money, the width was under as expected, but the weight was REALLY close.  The balancing act to put a boat on bathroom scale is interesting to begin with.  Any little move and the number shifted.  After multiple attempts to get a stable number we finally got the scale to read a constant 75.0 lbs.  The class minimum is 75.0 lbs. The one issue that came out of measurement was my sail.  Unfortunately the sail came with a bolt rope on it when I ordered a loose footed sail.  I seam ripped off the bolt rope, but there was still too much foot shelf to measure in.  To be legal, I had to lace the sail to my boom with sail ties.  It wasn't pretty, but it got me on the race course.  

Setting up before the race on Saturday 

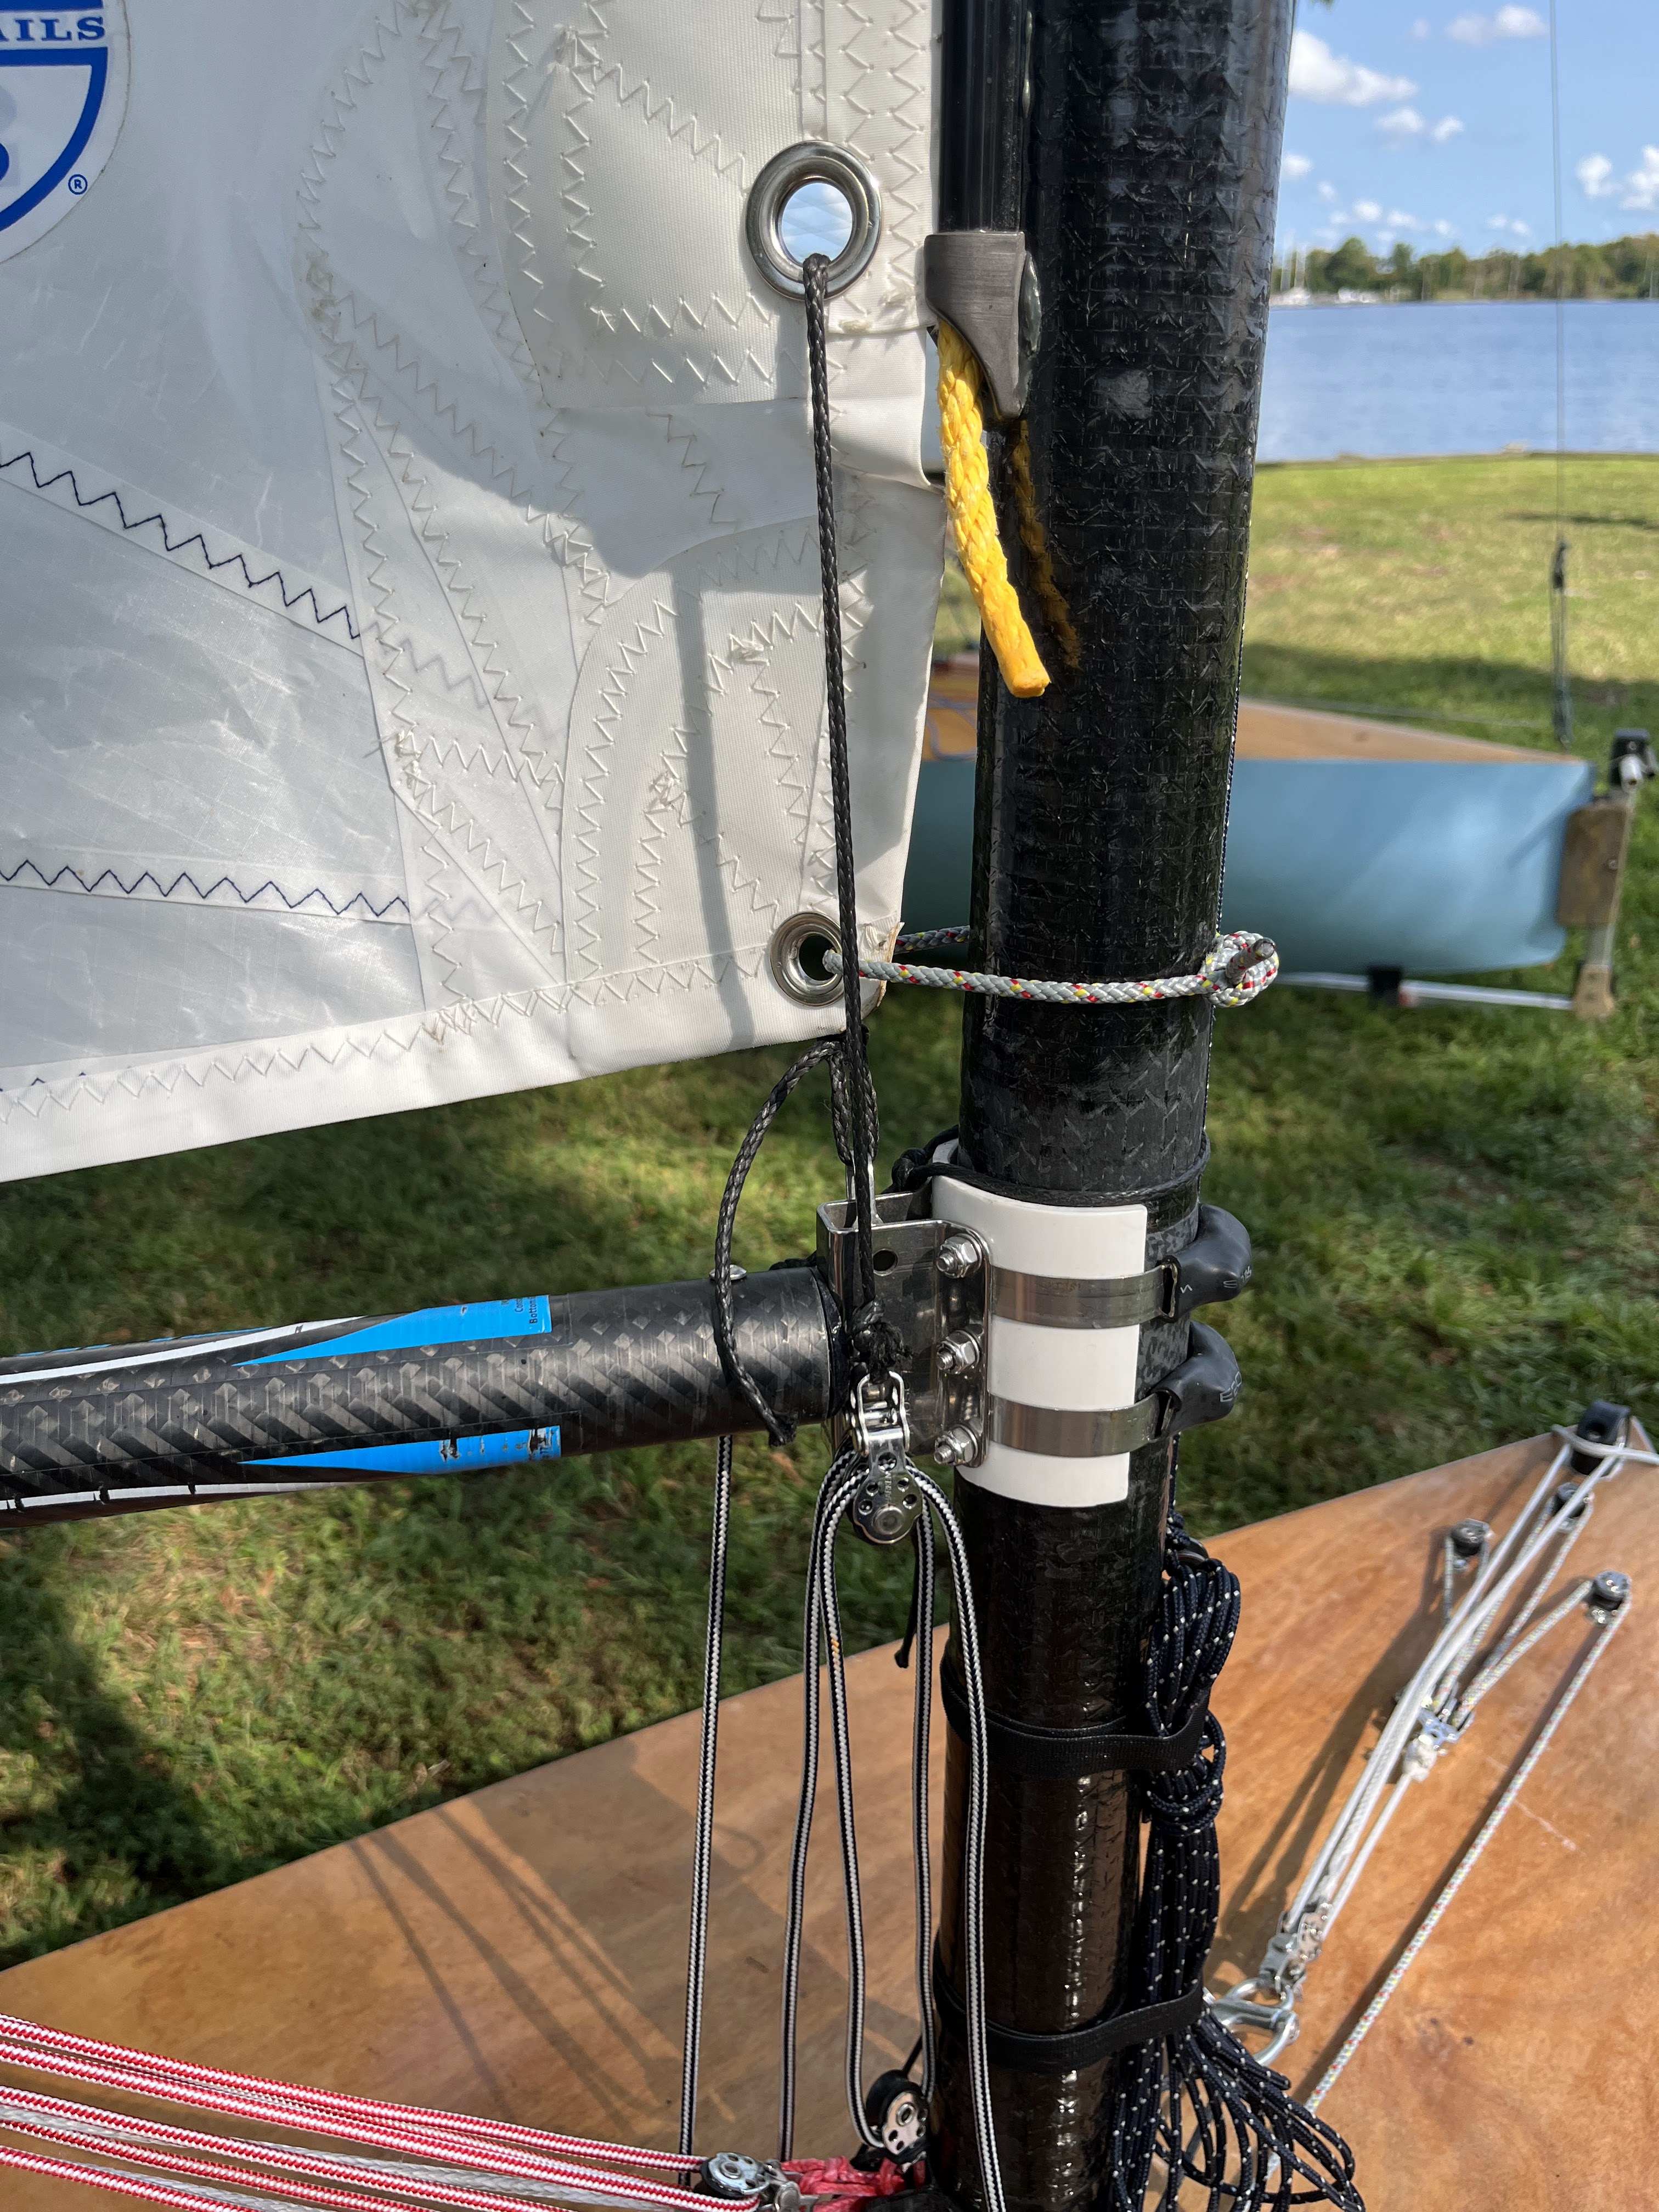
With all the rush to get the boat completed I didn't do a great job of documenting some of the details, but I had a fun time making carbon fiber fixtures for the boat.  These include the vang attachment to the boom, the gooseneck, and the vang/control line fitting on the mast.  Additionally I made the gantry rudder bracket and the cassette sleeve for the rudder along with a curved-to-fit flat tiller.  As seen in the picture above.  
Most of these fittings were successful.  The gooseneck, unfortunately was not.  The bolt holding the pin in loosened during the race had sufficient force to pry and brake the carbon part off the mast.  On further inspection, the composite was a bit epoxy starved and was bound to break eventually.  Glad to get that breakage out of the way on day one.  
Mast exit from the hull.  Red line is the vang, black/white is the cunningham and the gray line is the puller.

I paused quickly at the waters edge to christen #134 with a can of Corona Premier before slipping the yacht in for a (less than) graceful departure onto Boca Ciega Bay.  

Almost immediately I had lesson 1:  Add nonskid to the bottom of the boat.  I wasn't out there for 5 minutes and managed to slip and fall multiple times.  

Lesson 1 was followed shortly thereafter by lesson 2:  bring a bailer or sponge.  
As an homage to the wedge, I cut the tanks at an angle to meet the aft deck of the boat.  I think it looks cool, but when slipping and sliding with the boat on a heel, water entry from the back was pretty frequent.  doah.  Pretty sure Jeff  L. told me not to do that.  

After a not so bad start to the first race  I found myself moving backwards in the fleet pretty quickly.  The boat wasn't pointing very well at all.  I hadn't started playing with the mast puller yet, but I started with the mast aft.  This, along with a very hard to adjust traveler made upwind in the lighter breeze of the morning a challenge.  I figured some tuning out, but the loop around the mast that I had the puller attached to was slipping and getting longer.  This was not helping my situation.  To add to my problems, the boom blocks were not staying in the locations I tied them.  I had hoped that a couple clove hitches on either side and some duct tape stoppers would maintain their location through the weekend.  I was wrong.  The forward block was on the move aft.  

Lesson 3: fasten boom blocks to the boom

At some point the slipping block made crossing the boat nearly impossible.  This led to a capsize and swimming.  After 3 races in a group of 5 Gen 2 boats, I managed a 4-5-5.  After recovering from the capsize and turning the inside of the boat into a jacuzzi, I decided it was time to head to shore, regroup and make some tweaks.  
A quick swim after getting the mainsheet clothesline job

I made it out in time to watch the last race start, but I did get a chance to go upwind with the lovely sea breeze that filled in.  The boat felt good with the mast finally adjusted forward...and then BANG! the gooseneck let loose.  I limped in to the beach to pack it in for the day.  Not a great first showing, but she has potential.  I'll take it.  
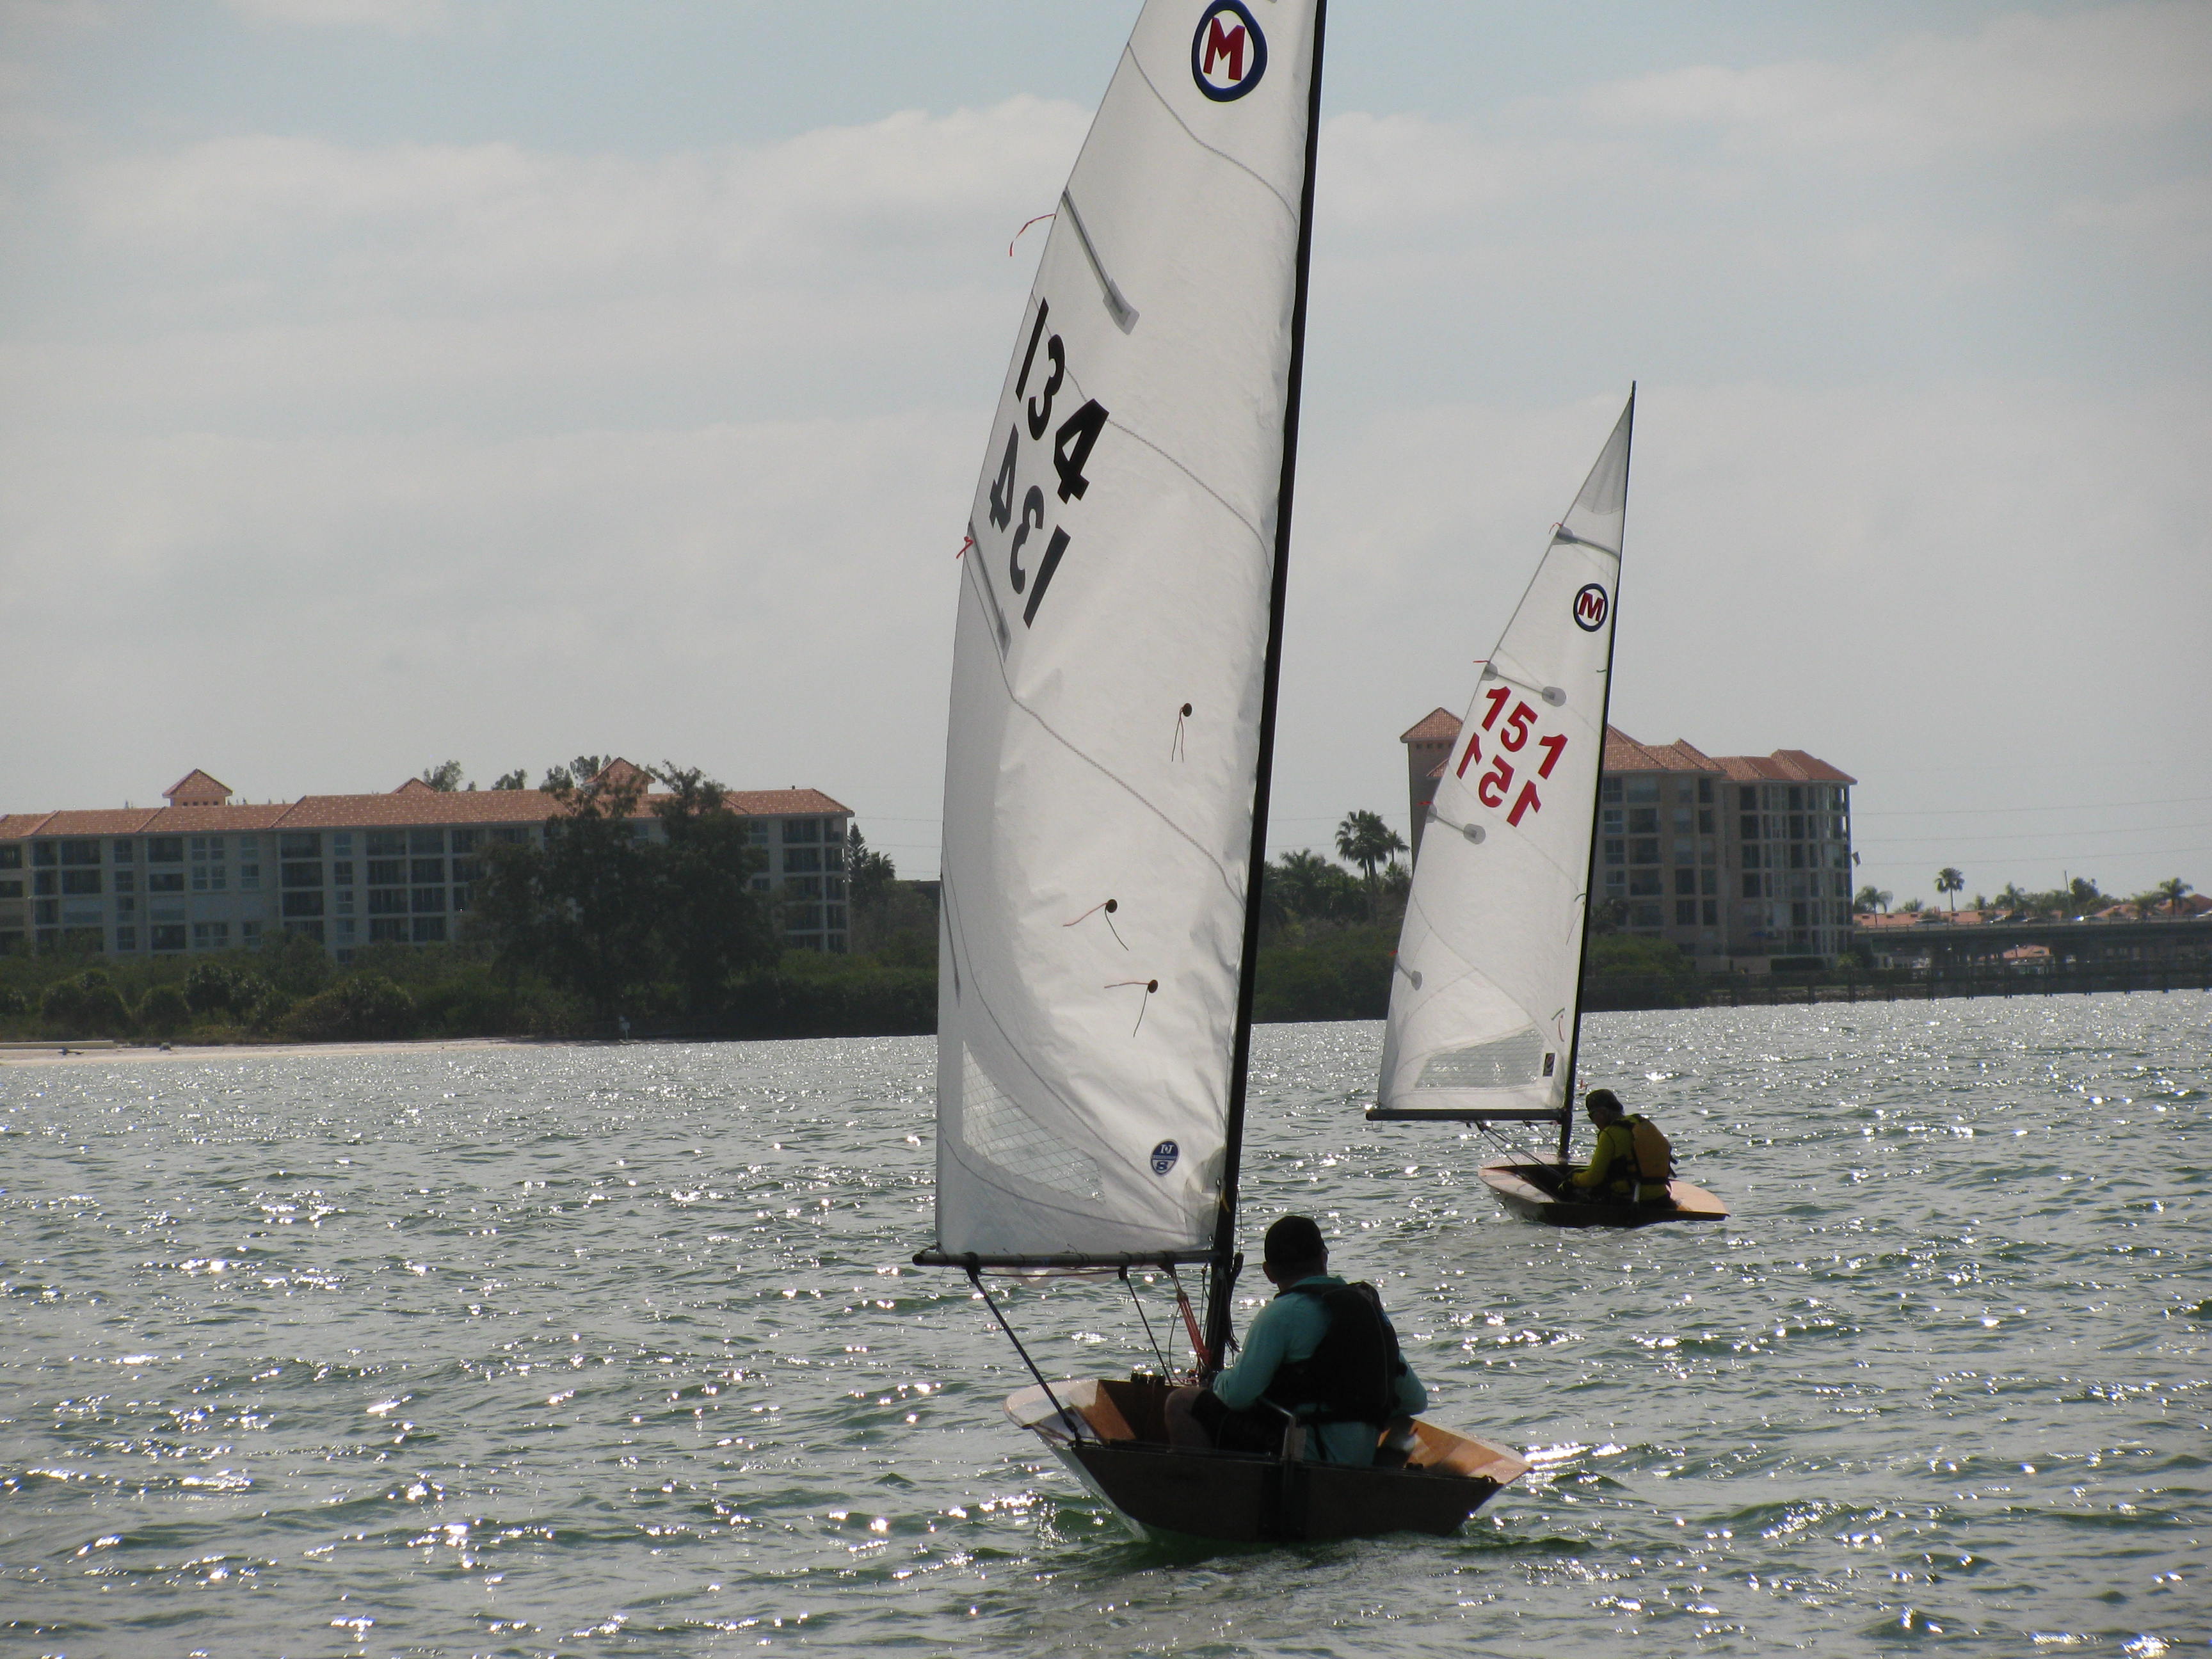
Off the starting line during one of the races on Saturday

With a new gooseneck ready to go and some hospital socks that my parents gift me (complete with a nonskid bottom), I was ready for day two.  The day was light air dying off to nothing but we managed to get four solid races in.  What a difference a day makes.  I got some great advice from a fleet full of smart people and had some time to implement some changes.  Traveler in the center is key for the light stuff.  I ditched the 2:1 mainsheet system too.  I also fixed the puller so I could get the mast raked farther forward upwind.  With the mast and board position slightly different from the fleet, getting the rake forward really made a big difference. I like light air, and typically do ok in these conditions.  Between that and some positive changes on the boats...and hospital socks, day 2 went well.  I was challenging the leaders and pulled off a 1-1-2-1 for the day.  I learned a lot about the boat during the regatta and there are lots of areas to improve.  Time to optimize the boat and get ready for the Nationals in Elizabeth City, NC.  
Family and friends on the Hrududu.  It was great to have some physical and morale support for the weekend! So glad they could all be there. Getting this boat on the water has been in the works for 7 years.

Prestart jockeying for position

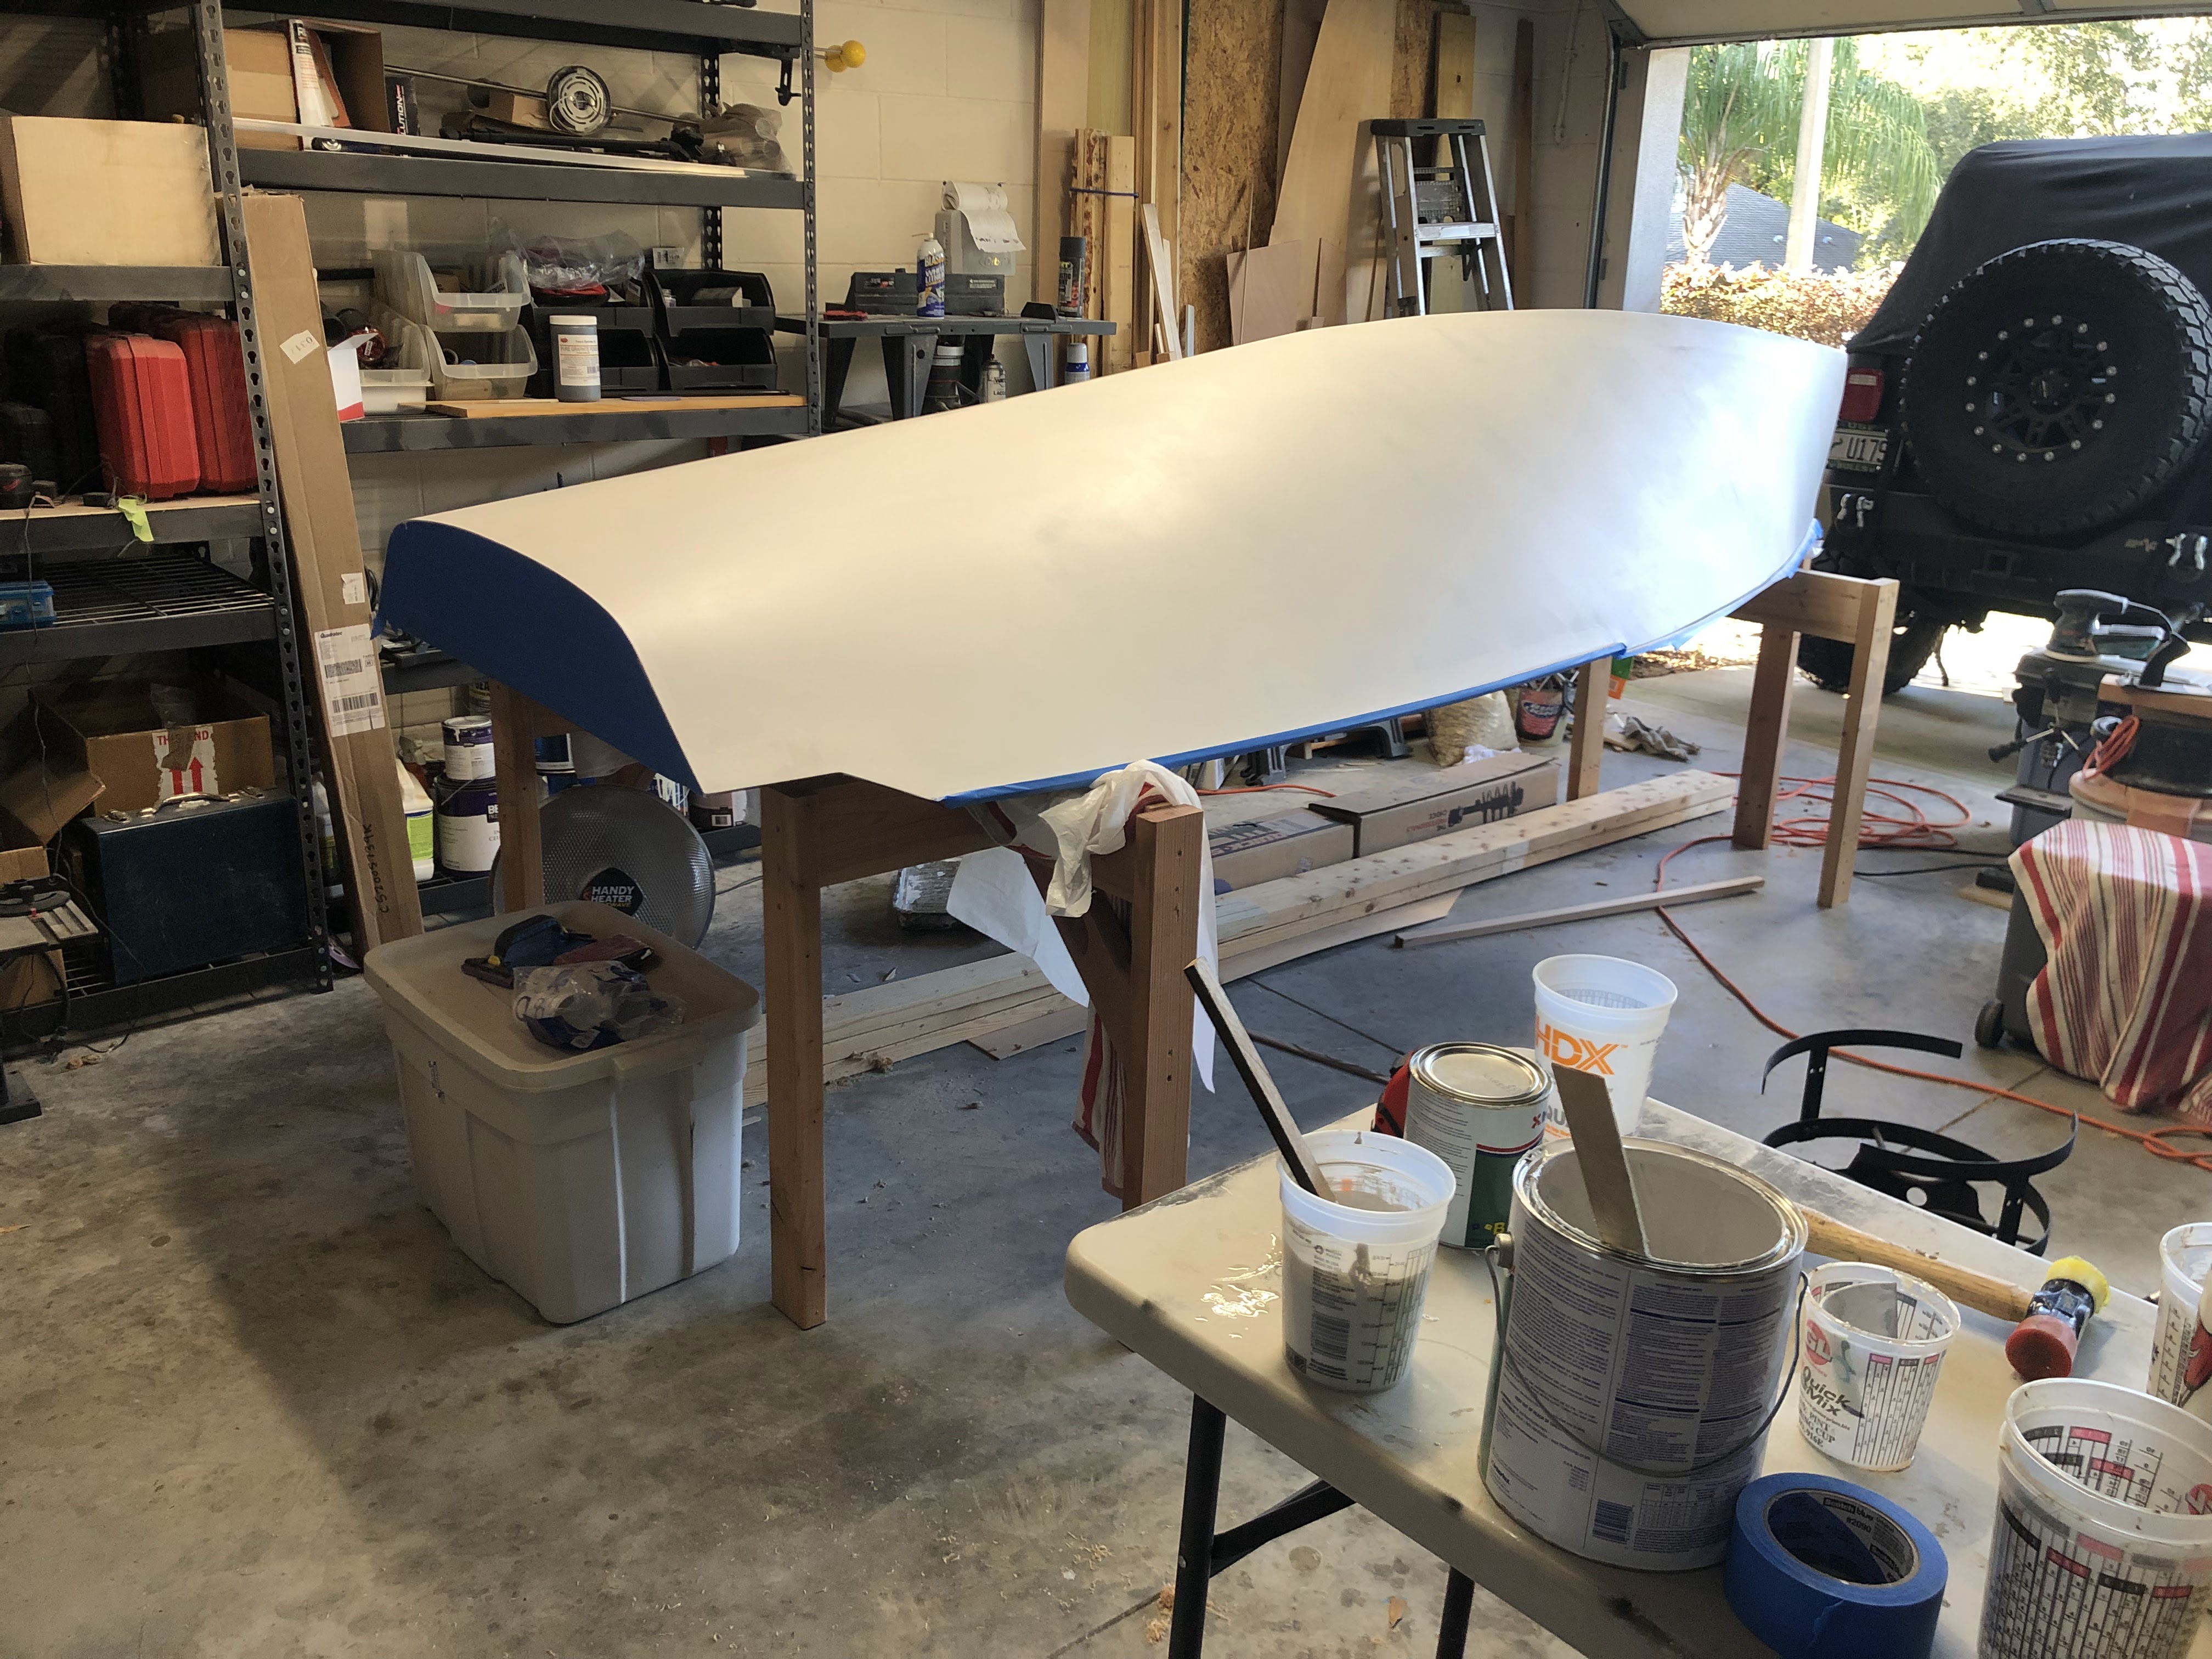
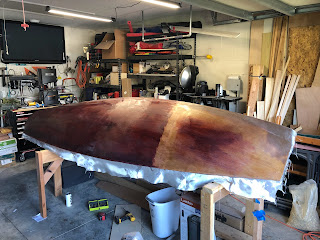
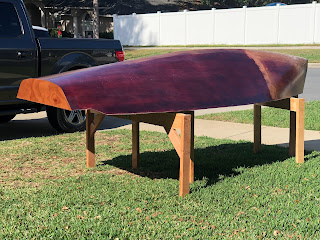
Good side view of the boat with the reversed bow

Getting ready to round the windward mark

Filling and fairing, but not real fair

Close inspection of the bottom after adding fiberglass and a coat of epoxy showed a bottom that needed some additional fairing.  The option of clear coat to show of the wood grain of the hull was just not an option any more.  I regret spending the time to stain the thing.  It would have looked good if I could have made it work. Oh well, on to plan B.  I got to work filling and fairing the bottom with putty.  I elected to put a white high build epoxy primer on the bottom as a final finish.  I selected Interlux Interprotect 2000E Epoxy Primer.  I'm not fancy enough to spray on so I went with the rolled on approach with a fine foam rollers.  

Last glimpse of the plywood finish as putty was applied to uneven surfaces. 

Boat after three coats of epoxy primer

Two more coats of the primer applied to finish out the hull

As I have learned, you need to wait long enough for the primer to be sandable without gumming up your sandpaper...but not too long.  Life and work got in the way of finishing out the hull.  By the time I got back to it 10 days later, this stuff was really hard!  I gave up and figured that I could get it sanded  before the skippers meeting at the Midwinters.  Wow, this stuff is really hard.  On race day two of us got to it and didn't make much progress after aggressively hitting it with 320 grit in places before working our way to a 600 grit wet sand.  Not great, but good enough.  Race day one had bigger problems than a fair hull for me to worry about though...


Blades

With the boat looking like a boat, focus was turned to the rudder and daggerboard.  I had previously glued the blanks for both using alder wood.  The alder was cut into 1" strips and laminated together with the each adjacent piece flipped end to end and rotated 180 degrees to minimize warp.  First step was to plane the parts.  Thankfully I had a buddy with a nice DeWalt planer that was willing to help me out.  

Once both sides are parallel and planar, the fun can begin.  The design I chose was a NACA0012 with a 6" chord for the rudder and a NACA0009 with a 9" chord for the daggerboard.  The plan was to use my table saw and cut down to the outer mold line of each foil.  Using an offset table from one of many online sources, I created a spreadsheet that output the cut depth for each 1/8" step.  This would leave a 1/16" wood fin between cuts. To ensure symmetry, the same cut is made on both sides of the blank.  Here's the foil cross sectional shapes:

Rudder blank half way through cuts

Rudder blank with table saw cuts complete

After all the cuts were completed, I knocked out the wood fins to get down to the rough foil shape.
Then there was a bunch of sanding to perfect the shape.  
Once the shape was looking good the next step was to put a couple layers of carbon and a layer of glass over the top.  I have some peel ply so I wrapped that on the blade after wetting out the cloth.  The rudder fit in my kitchen vacuum bag material so I elected to vacuum bag it using that.  I used paper towels as the bleeder cloth.  It actually worked pretty well!

Sanded rudder blade over vacuum bag material

Rudder over the carbon/glass cloth

Rudder after bagging and vacuuming/sealing in the bag


Once the rudder was unwrapped I sanded it down using 400 and then to 600 grit paper.  A thin coat of epoxy was then applied over that.  Finally, one last sanding to get it to something race ready.  Unfortunately, I only had time to finish the rudder at this point.  The daggerboard from the #73 Bad Hare Day (the wedge), wasn't the prettiest blade, but it would work for now.  I needed to focus on finishing the bottom of the boat and putting hardware on the deck.  Lots to do and only a couple months until the Midwinters at Gulfport!


19.1.22

Fixture freedom

 Deck complete, the boat was structurally very stable and finally ready to be removed from the framing fixture.  I put the beginnings of this boat in the fixture back in December 2016!  After removing the screws, the first exciting task was to get an accurate weight.  Up to this point I had an estimate based on the weight of what I was putting into the boat.  It came out to 52.3 lbs.  This is about what I think is expected for a Mistral at this stage in the game.  Lots of hardware and work to do still so I am not too concerned about how to get to the 75 lb. class weight minimum.  Before getting started on the bottom, I took some progress pictures:


Back in the garage, it was time to fair and finish the bottom with glass cloth.  The first step was to add material and fair the bow.  I intentionally cut the bow off and added a skeleton piece of plywood to build up the volume of the bow at the waterline.  
After putty application

Port side after fairing

The next step was to glass the hull.  I put a layer of 8 oz. cloth on each side with a 4 inch overlap along the keel.
dry fit and trimming of glass cloth

view from the aft end of the boat

After wetting out the cloth

After glassing the boat bottom, I faired the hull along the glass cloth overlap edges and put a couple more coats of epoxy over that to build up and smooth out the bottom.  Taking advantage of a warm, sunny day, I put the boat outside to finish curing. I intentionally didn't put the UV stain on the front of the boat.  The assumption was that it was going to get a bunch of fairing compound added and would require paint.  Maybe not the best decision in hindsight, but it is what it is.  I will paint the front when I'm done adding epoxy and fairing the bottom.  The mahogany stain is a really deep red.  Looks like a glass of cabernet.  Thankfully I still had some of the alcohol based stain and was able to touch up in places where sanding was needed.  


The next area of focus is on the blades.  I picked up a piece of alder wood for this task.  This species is strong and light.  I laminated 1" strips of the wood with each adjacent piece rotated and flipped 180 degrees to ensure the boards don't bow later down the road.  The daggerboard is 5'-6 at the moment, but this will probably get trimmed down.